Master Winter Wildlife Photography: Everything You Need to Know
![]()
Master winter wildlife photography with expert tips on camera settings, gear, composition, and field strategies to capture stunning images of animals in snowy landscapes.
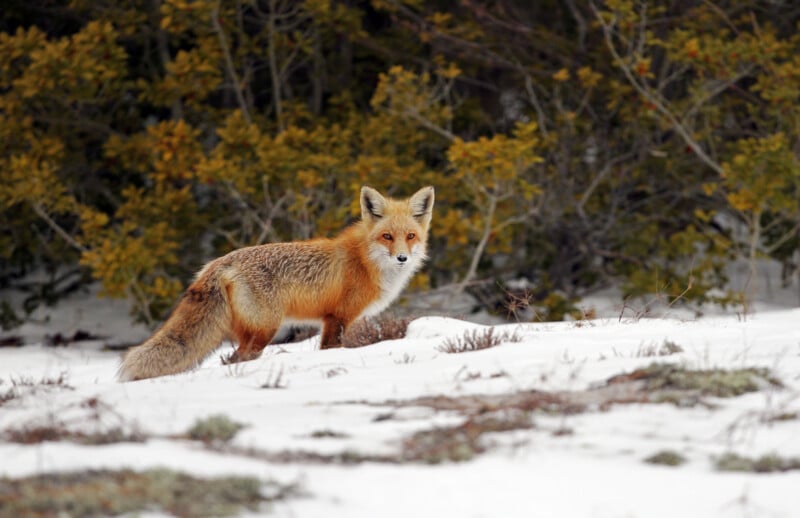
There is something truly magical about winter mornings in the wild. A soft frost blankets the trees, delicate tracks mark the snow, and the world seems to hold its breath. These are the moments that make wildlife photography incredibly rewarding for me. Capturing animals in a landscape transformed by winter is both exciting and challenging. However, short days, reflective snow, and frigid temperatures require careful planning and thoughtful attention to detail.
Over the years, I have learned that success in winter wildlife photography comes from combining technical knowledge, the right gear, and a clear strategy for observing and capturing wildlife behavior. In this article, I will share my personal tips for camera settings, gear choices, and practical techniques that help me create compelling winter wildlife images.
Key Challenges in Winter Wildlife Photography
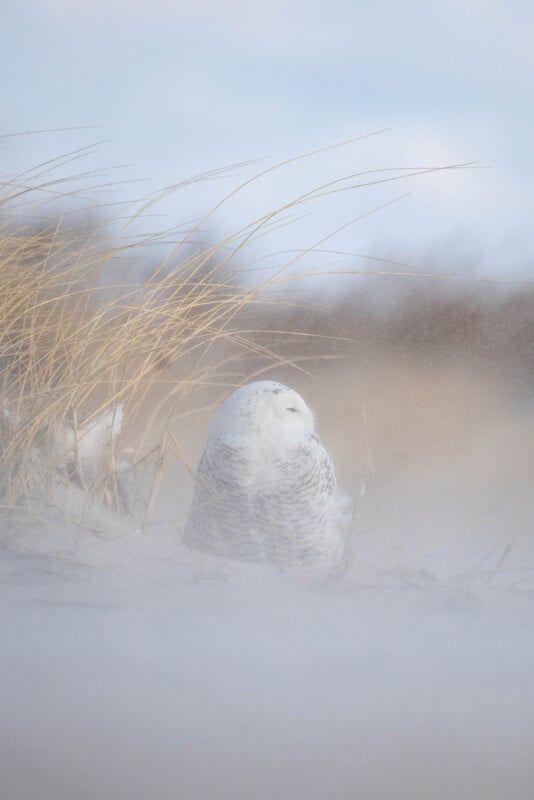
Winter presents several unique challenges that require preparation and adaptability. Light is often one of the biggest obstacles, as short days and overcast skies create soft, diffused lighting that can flatten a scene. While this light adds a serene atmosphere, it can make it more challenging to emphasize textures in snow, fur, or feathers. Alternatively, “blue bird” days, those lacking clouds, can result in harsh light blinding off the snow. It may seem self-explanatory, but I adjust my exposure carefully, balancing ISO, aperture, and shutter speed to ensure sharp, well-exposed images even as light and weather change throughout the day.
Snow is both beautiful and challenging to work with. Its brightness can easily mislead a camera’s metering system, resulting in over- or underexposed images with either dull gray tones or flat, blown-out areas in snow, where the details are lost. To overcome this, I rely on exposure adjustments and check my histogram frequently to preserve details in both the snow and the subject.
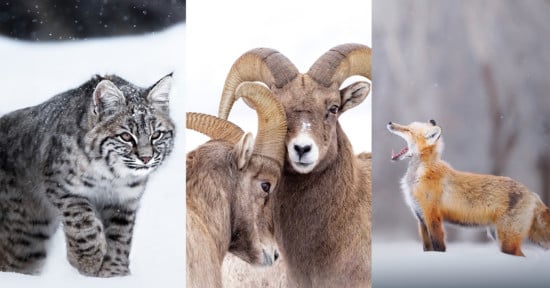
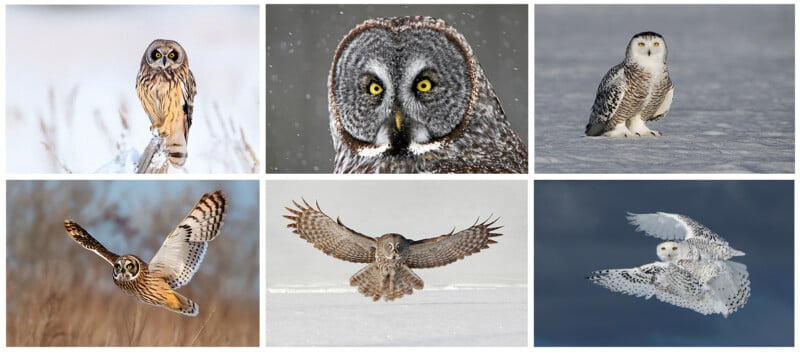
Cold weather also influences how I operate in the field. Batteries drain quickly, condensation can form on lenses and inside the camera, and mechanical parts respond more slowly in freezing temperatures. Carrying extra batteries, keeping them warm in an inner jacket pocket, and protecting my gear from moisture are essential practices. On top of this, wildlife is constantly moving. From birds taking flight to foxes darting through underbrush, fast reflexes and precise camera settings are crucial for capturing action successfully.
Although there is no single right way to photograph wildlife in winter, these are the techniques and lessons I have gained over years of working in cold, demanding conditions with often fast-moving subjects.
Camera Settings for Winter Wildlife Photography
Exposure Settings: Aperture, Shutter Speed, ISO
Getting exposure right is fundamental for winter wildlife photography. I usually start with aperture because it controls both light and depth of field. Shooting wide open with a low f-stop allows me to isolate subjects against snowy backgrounds while keeping them sharp. Therefore, my go-to is to use the fastest aperture my lens offers; f/2.8-4 is ideal if your lens can do it. When I want both the subject and the landscape in focus, such as for an environmental portrait that shows off both the animal and its habitat, I use a wide-angle lens and increase the f-stop to capture more depth throughout the scene, usually around f/11-f/16.
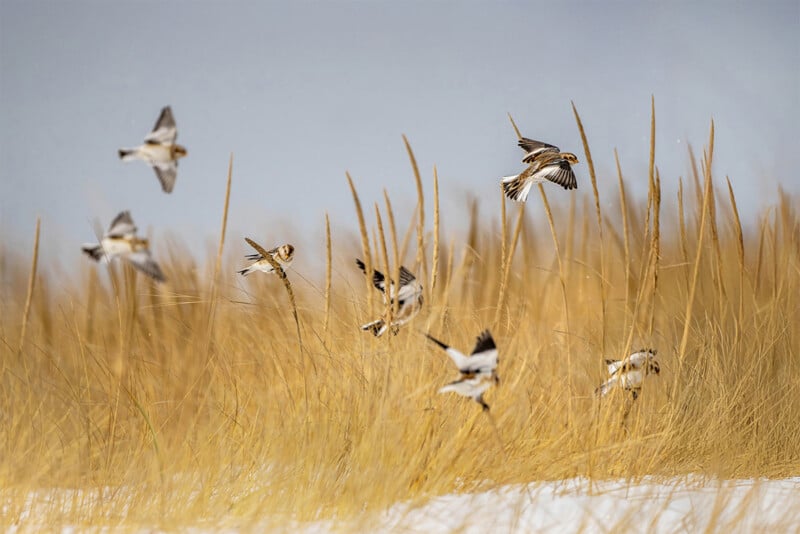
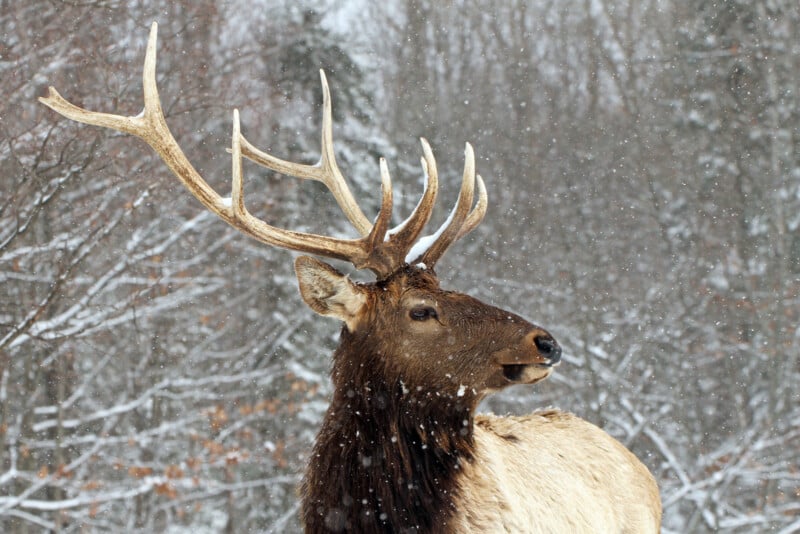
Shutter speed is equally important, particularly for fast-moving subjects such as birds in flight. I typically start between 1/1000 and 1/3200 of a second, adjusting according to the animal’s speed and lighting conditions. Faster speeds are needed for subjects in full motion, while slightly slower speeds may help preserve image quality in low light. For larger or moderately paced animals such as deer or elk, a shutter speed around 1/500 of a second often works well. By adjusting shutter speed to match both movement and lighting, I can consistently capture crisp, sharp images.
When the light is good and I am photographing very fast subjects, such as a fox running or an eagle or owl mid-hunt, I pay close attention to how I use burst-mode shooting. Instead of holding the shutter button down continuously, I shoot in short, controlled bursts as the action unfolds.
Every camera has a limited memory area called a buffer, which temporarily stores images before they are written to the memory card. If you hold the shutter down too long, that buffer can fill up, causing the camera to slow down or stop shooting entirely at the worst possible moment. By shooting in quick bursts and briefly releasing the shutter between them, I give the camera time to clear the buffer and keep shooting when the action peaks.
If you are new to this concept, it helps to check your camera’s manual or look up its buffer capacity online. Knowing how many images your camera can capture in a burst before slowing down allows you to time your shots more intentionally and avoid missing critical moments in fast-moving wildlife situations.
ISO is an essential tool that balances shutter speed and aperture, allowing me to maintain proper exposure even in low-light conditions. In winter, I often raise ISO to 800, 1600, or even 3200 to ensure fast shutter speeds while keeping noise manageable. Although some photographers prefer to lock in ISO based on a subject reading, I typically rely on Auto ISO with a maximum limit of 10,000. This approach provides flexibility in fast-changing light, background, and overall conditions, while allowing me to refine the image further in post-processing.
Maintaining proper exposure in snowy conditions is vital because snow can easily fool a camera, resulting in images that appear flat, gray, or overly bright. I take test shots frequently and use my camera’s exposure compensation dial to make quick adjustments. This ensures that snow looks bright and natural while preserving shadow detail and keeping the subject clear.
Focus Settings
Accurate autofocus is critical when photographing wildlife, particularly for subjects that move unpredictably. I rely on continuous autofocus, AI Servo on Canon or AF-C on Nikon, combined with high-speed burst mode to capture multiple frames per second. This method allows me to track moving animals precisely and maximize the chances of freezing decisive moments. Depending on the scenario, I use single-point autofocus for predictable subjects or switch to zone or wide-area focus when multiple animals are moving. Composing slightly wider and cropping later helps me ensure that I do not miss critical action.
White Balance
Snow can cast a cool blue tone, so I often set a custom white balance or use presets such as daylight or cloudy to maintain natural colors. Shooting in RAW provides flexibility to adjust white balance in post-processing. I also take test shots when moving to new lighting conditions to ensure that the colors remain accurate throughout a session.
Metering Mode
Proper metering is essential for balancing bright snow with darker subjects. Evaluative or matrix metering works in many situations, but snow can mislead the camera. In these cases, I rely on spot metering on the subject to ensure accurate exposure, continually checking the histogram to preserve highlights and shadows.
Drive Mode
High-speed continuous shooting is indispensable in winter wildlife photography. Capturing multiple frames per second ensures that I do not miss fleeting action, whether it is a bird lifting off or a fox leaping across a snowy field.
Lens Selection
I choose lenses based on the subject and the scene. Telephoto lenses, such as 70-200mm or 100-400mm, are common but often don’t get me visually close enough to skittish wildlife without disturbing the animal or changing its behavior due to human presence. I prefer to use super telephoto lenses that get me to at least 500mm. Great options are zooms like a 150-600mm, 300-600mm, or primes like a 500mm or 600mm lens, sometimes even with a 2x teleconverter to double the reach.
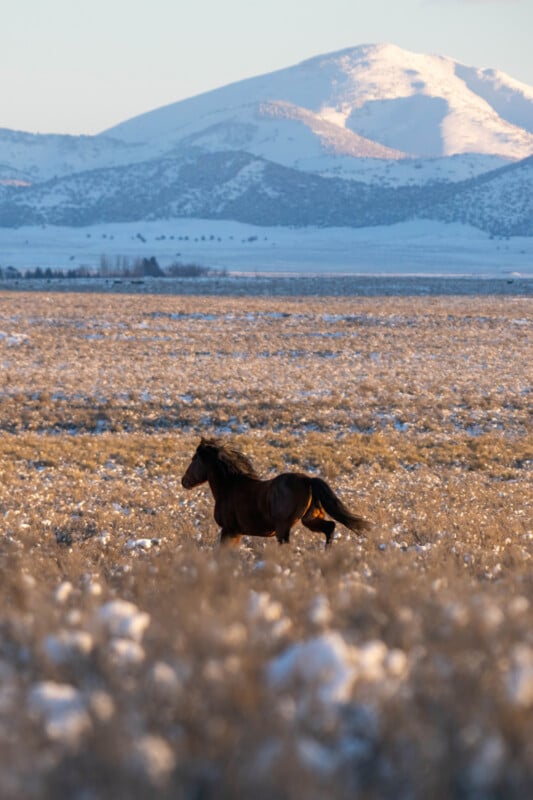
Wide-angle lenses still have a place in my winter wildlife kit, though. They enable me to add variety with imagery that showcases the animal smaller in its habitat, creating sweeping environmental portraits that help tell the full story and add to a well-rounded portfolio for each species or location. When possible, I like to carry two cameras, each with a different focal length lens, so I can adapt quickly to changing conditions and never miss an opportunity while changing lenses.
Lens Accessories
While often used for landscape and forgotten for wildlife, polarizing filters help reduce glare from snow and ice. I find them especially helpful when creating those environmental portraits. Additionally, basics like lens cleaning tools and hoods protect against moisture and frost, making a significant difference in maintaining image quality in harsh winter conditions. One quick tip: if it is snowing, always hold your camera and lens at a downward angle to avoid snow from accumulating on the front element of your lens. Similarly, when walking in snow, if you have your gear out, use a lens cap or cover as the snow can blow or kick up onto your lens.
Additional Tips for Winter Wildlife Photography
Safety and Comfort
Beyond gear and settings, being out in frigid conditions presents its own challenges that can affect your photography. To ensure that I am comfortable, winter-safe, and ready to create, I always dress in many layers, wear insulated, waterproof boots, use fitted boot spikes or crampons when icy, and choose electric-heated gloves that allow me to operate the camera efficiently. Hand and foot warmer packets or insulated battery pouches keep both my gear and myself functioning in sub-zero conditions. If you aren’t a frequent winter adventurer, I recommend trying on your full winter outfit outside before you hike out with it to ensure you are warm and everything fits and works properly.
Understanding Animal Behavior
Anticipating wildlife behavior is a key part of successful photography. I carefully observe tracks in the snow, feeding areas, and peak activity times for different species to predict movements. Patience is essential. I have spent hours waiting quietly for the perfect moment, knowing that rushing often results in missed opportunities. Studying patterns and staying observant help me capture natural, compelling behaviors in my images.
YouTube is also a valuable resource for learning about wildlife behavior from the comfort of your own home before venturing out. Knowing what to expect or look out for with each of your target wildlife species will greatly inform how you photograph them, thereby increasing your keeper rate.

Creative Composition Techniques
I look for ways to add depth and interest to my images, especially in the snow, which can create a lot of negative space in photos. Snow-covered branches, frozen water, or animal tracks can serve as foreground elements. Shooting from low angles emphasizes size and presence, while experimenting with vertical and horizontal compositions adds variety to my portfolio. I often use natural frames and leading lines to guide the viewer’s eye toward the subject.

Efficient Field Workflow
With limited daylight, efficiency is essential. I pre-set my favorite camera modes and settings for different conditions, saving them to my camera’s custom buttons, keep gear organized for quick lens or filter swaps, and follow a mental or written shot list. This list includes checking backgrounds, capturing vertical and horizontal compositions, watching for specific behaviors, and remembering to switch lenses for environmental portraits. Following this method ensures that I leave the field with a well-rounded set of images.
Post-Processing Tips
Post-processing is where I bring my winter wildlife images to life. I adjust exposure to brighten snow while preserving detail, sharpen textures to emphasize fur, feathers, and snow, and fine-tune white balance to correct color casts. Subtle contrast adjustments enhance depth and dimension, while tools like Lightroom’s clarity slider help both the subject and the environment pop without overdoing it. I also use Photoshop to selectively dodge and burn areas to highlight key features while maintaining the scene’s natural feel.

Putting It All Together
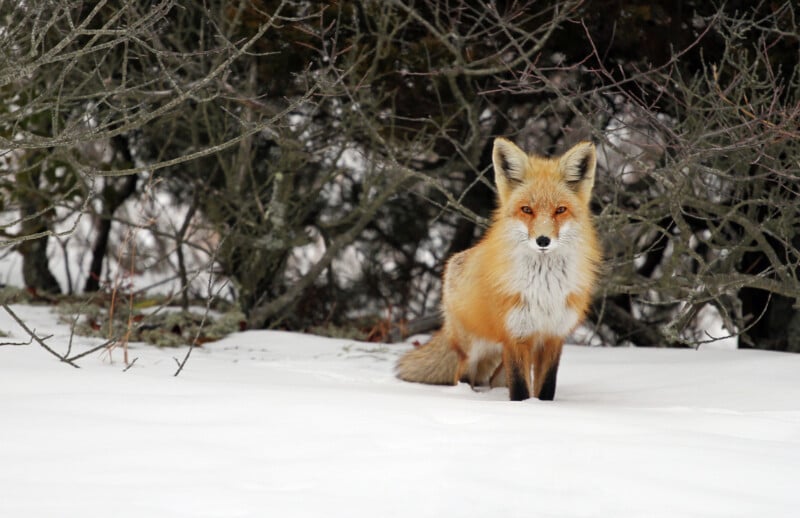
Winter wildlife photography combines technical skill, preparation, and careful observation. Understanding how light, snow, and animal behavior interact allows me to create images that tell a story. By mastering exposure, focus, white balance, metering, and lens choice, I can capture fleeting moments that highlight the elegance of wildlife in winter habitats. Whether it is a bird lifting off a frost-covered lake or a fox pausing under the soft glow of sunrise, using careful techniques, a shot list, and thoughtful field strategy ensures that every outing produces a strong, varied set of images. Winter photography is a challenge, but it is also a season of unparalleled beauty and creative opportunity.
Image credits: Kate Garibaldi